

Support hours
For vendor operations, the Pixwel Platform team runs Monday–Friday, 24/5, with no weekend coverage unless pre-approved. Work requests submitted over the weekend are processed first thing Monday morning. (This is the vendor-facing operational window; for general platform support hours, see Support.)Turnaround times
Asset handling
- Nightly emails — assets delivered each day are reported in a nightly email around midnight (customizable in notification settings). No email is sent on days with no new assets.
- Special instructions — territorial restrictions and special handling are noted directly on the asset or in the nightly email.
- AE Collects — AE Collects provided to Pixwel are passed straight to the vendor via shared Aspera accounts, dropped into an
AE COLLECTfolder without renaming or reorganizing. - Stitching & QC — the vendor stitches per the approved guide. Pixwel verifies files match the agreed specs but isn’t responsible for content QC; content issues go to the originating department.
Work request best practices
- Don’t move a work request backward in status without justification.
- Post-approval changes require the territory to place a new order — don’t roll back the approved one.
- To remove incorrect final files, contact platform@pixwel.com.
- Avoid rolling back completed orders — it affects reporting visibility for territories and Head Office.
Changing work request status
1
Open the status menu
Within a work request, click the vertical ellipsis (⋮) beneath the asset thumbnail.
2
Choose the status
Select the new status and click Save Status Change.
3
Give a reason
Enter the reason for the change and click Confirm.
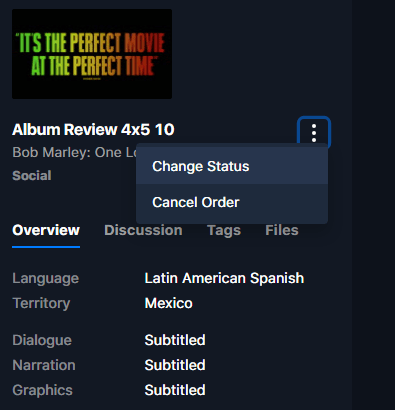
Within a work request, open the ⋮ menu beneath the asset thumbnail and choose Change Status.
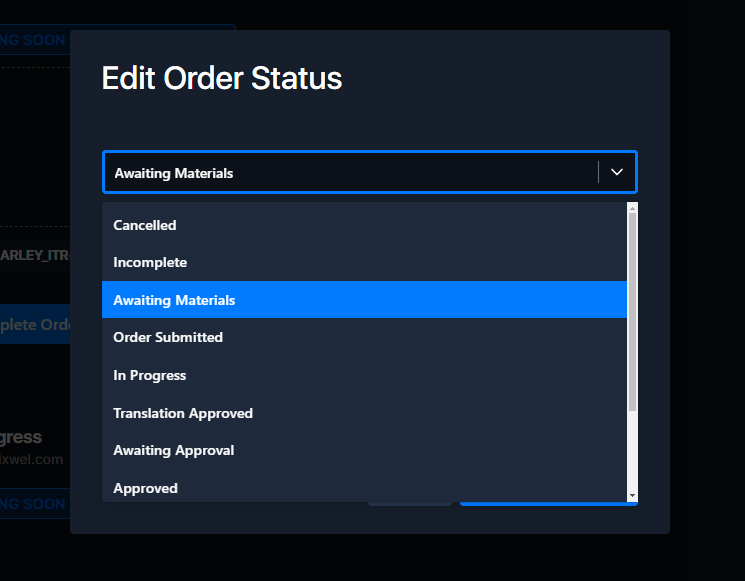
Pick the new status from the Edit Order Status dropdown.
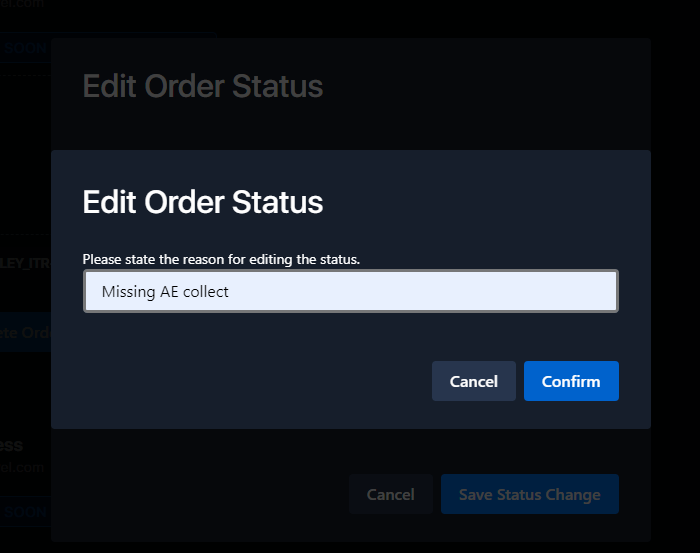
State the reason for the change and click Confirm — the reason is visible to Head Office in reports.